DHT11 Sensor with Arduino
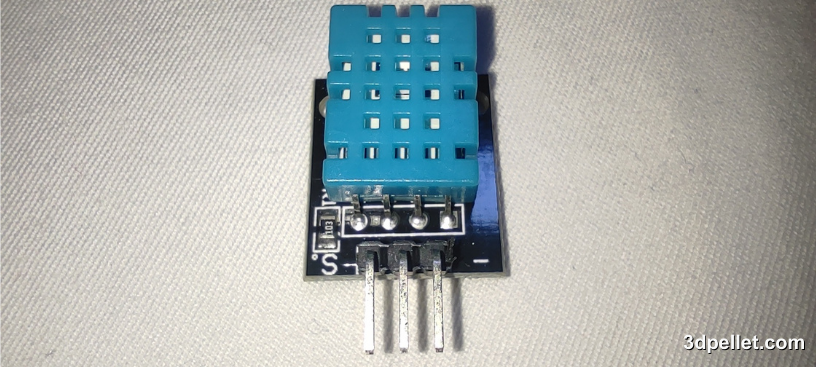
The DHT11 sensor enables the simultaneous measurement of temperature and humidity. Its internal processor facilitates the measurement process by providing digital results, making it compatible with microcontrollers such as those found on any Arduino board. This sensor is distinguished by its blue plastic casing and its limited specifications, particularly regarding range and measurement accuracy.
In this article, I will show you how to use the DHT11 sensor together with Arduino. We will start by exploring its fundamental characteristics and then develop a simple Arduino project involving this sensor.
What does the DHT11 sensor measure?
As mentioned earlier, the DHT11 sensor allows simultaneous measurement of temperature and humidity. The temperature can be measured in a range from 0 to 50 degrees Celsius, with an accuracy of 2 degrees Celsius, while humidity can be measured in a range from 20 to 80%, with an accuracy of 5%. Its sampling frequency is 1 sample per second (1 Hz).
The DHT11 is considered a fairly basic sensor and is recommended for use in educational, testing, or applications where extreme precision in measurements is not required.
Example of using the DHT11 with Arduino
This sensor can be acquired in two different ways. Individually, which includes only the DHT11 sensor, or integrated into a printed circuit board (PCB). In the case where we only have the sensor, it has 4 pins.
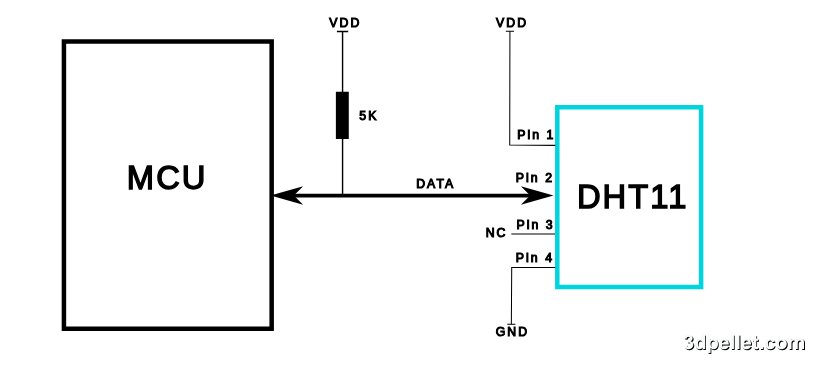
The pins of the individual version of the DHT11 are:
- VCC: Power supply
- I/O: Data transmission
- NC: Not connected, unused pin
- GND: Ground connection
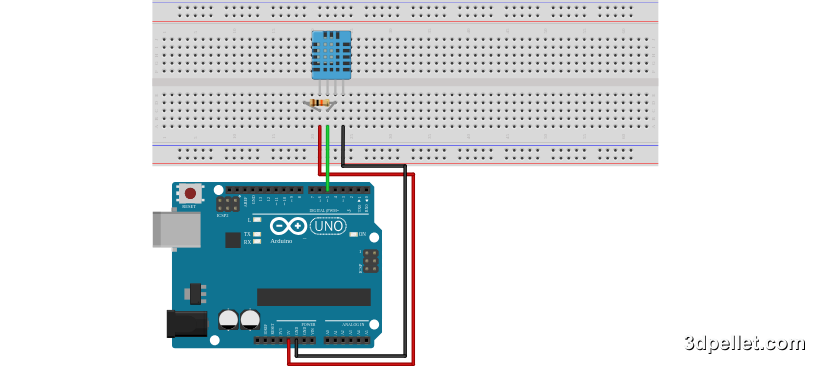
In this case, where we only have the sensor, the manufacturer specifies that a pull-up resistor must be incorporated between the power supply and the data pin.
This way, the connection with Arduino would be as follows:
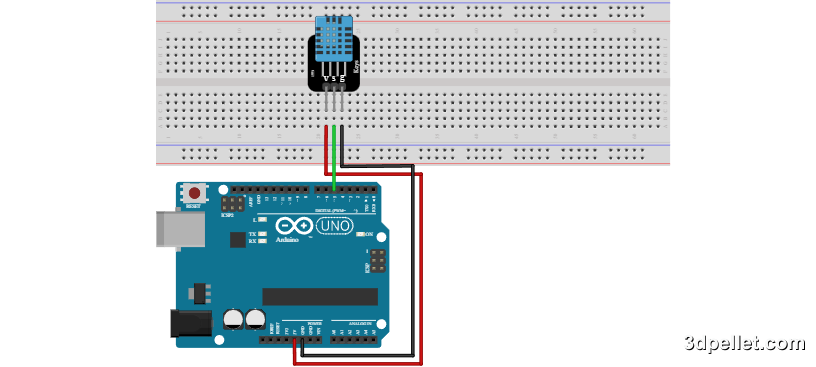
In the case where the sensor is on a PCB, it already includes the pull-up resistor. In this version of the sensor, the pins are:
- GND: Ground connection
- DATA: Data transmission
- VCC: Power supply
Therefore, in this case, the connection with Arduino would be as follows.
The DHT11 sensor uses its own bidirectional communication system through a single conductor, using timed signals.
During each data transmission, the sensor sends a total of 40 bits within a 4-millisecond interval. These 40 bits correspond to 2 bytes for humidity measurement, 2 bytes for temperature measurement, and an additional byte for error checking (8 bits of integral humidity data, 8 bits of decimal humidity data, 8 bits of integral temperature data, 8 bits of decimal temperature data, and 8 bits for checksum).
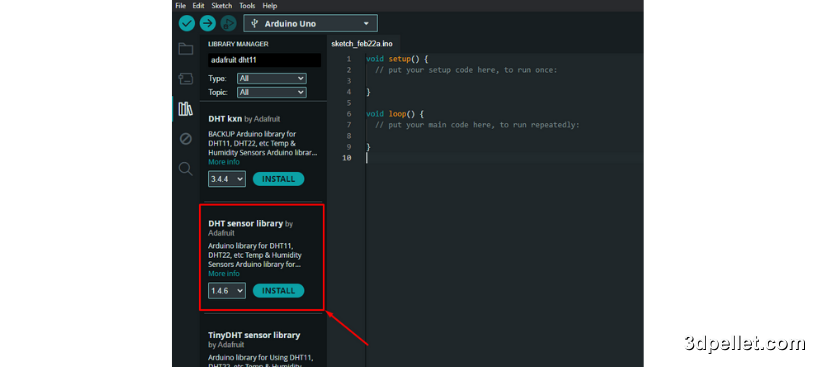
To read the data, we can consider the sensor’s operation and read the data directly. However, it’s more common to use a library that’s already implemented for reading this type of sensor. One widely used library is Adafruit’s. To install it, the simplest method is to use the Arduino IDE itself, as shown in the following image.
Once we have the library installed, we can read the data obtained from the sensor connected as explained earlier. For this, the following code can be used.
 1// Arduino example to use the DHT11 sensor
 2// More information: https://www.3dpellet.com
 3// Include the library
 4#include "DHT.h"
 5
 6
 7// Defining the pin to which the DHT11 sensor is connected
 8const int DHTPin = 5;
 9
10// Creating the dht object to measure temperature and humidity
11DHT dht(DHTPin, DHT11);
12
13void setup() {
14  Serial.begin(9600);
15  // Initializing the dht object
16  dht.begin();
17}
18
19void loop() {
20  // Waiting for the sensor to stabilize
21  delay(2000);
22
23  // We read the humidity and temperature
24  float h = dht.readHumidity();
25  float t = dht.readTemperature();
26
27  // If any of the variables has not been read
28  // correctly, we print a reading error
29  if (isnan(h) || isnan(t)) {
30    Serial.println("Error reading DHT11 sensor");
31    return;
32  }
33
34  Serial.print("Humidity: ");
35  Serial.print(h);
36  Serial.print(" % ");
37  Serial.print("Temperature: ");
38  Serial.print(t);
39  Serial.println(" *C");
40}
If you liked our content, help us by subscribing or leaving your like on our YouTube channel.