HC-SR04 Ultrasonic Sensor with Arduino
The HC-SR04 is one of the most popular sensors for measuring distance with Arduino because it is inexpensive, easy to connect, and very useful in educational projects, robots, and detection systems. It works by sending ultrasonic waves and measuring how long the echo takes to return to the module.
In this article we will see what the HC-SR04 sensor is, how it works, what its pins do, how to connect it to an Arduino board, and how to display the measured distance in the serial monitor with a simple program.
What is the HC-SR04?
The HC-SR04 is an ultrasonic distance sensor. This means it does not need to touch the object in order to measure the separation between the sensor and the surface in front of it. To do this, it uses an acoustic transmitter and receiver that operate at a frequency of 40 kHz, well above the audible range for humans.
This type of sensor is often used to:
- detect obstacles in small robots
- measure the approximate level of liquids or materials
- trigger alarms or proximity-based automation
- perform Arduino distance and time-of-flight exercises
Its output is not analog. The module works with two digital pins called Trig and Echo, so it can be used in an introductory example without external libraries.
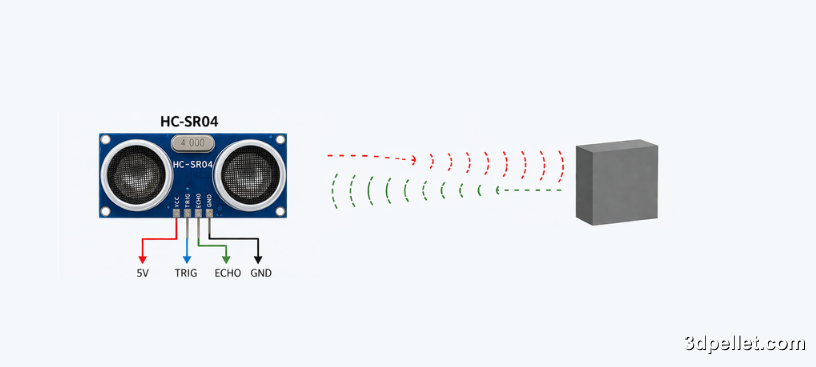
How the HC-SR04 Ultrasonic Sensor Works
The HC-SR04 works in a simple way. First, Arduino sends a 10 us HIGH pulse to the Trigger pin. When it receives that trigger, the sensor emits a burst of ultrasonic waves. If those waves hit an object in front of the module, part of the energy bounces back and returns to the receiver.
The Echo pin stays HIGH for the time it takes the sound to travel to the object and back. By measuring that time in microseconds, it is possible to calculate the distance with the formula:
distance_cm = echoTimeUs * 0.0343 / 2
The factor 0.0343 represents the approximate speed of sound in cm/us, and it is divided by two because the measured time corresponds to the round trip.
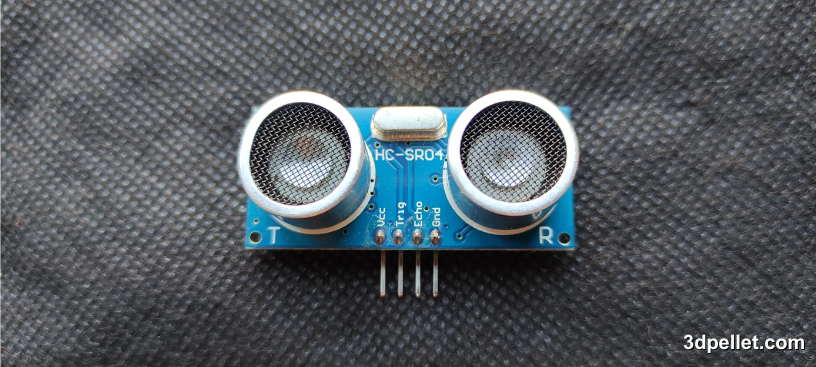
HC-SR04 Pins
The HC-SR04 module usually has four clearly identified pins:
- VCC: sensor power supply
- Trig: trigger input for the ultrasonic pulse
- Echo: digital output with the echo duration
- GND: common ground

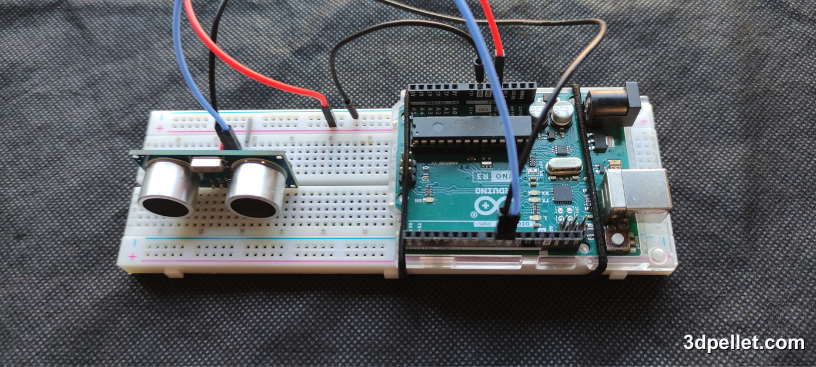
The reference connection in this tutorial uses an Arduino Uno or Arduino Nano running at 5 V. In that case, the wiring is:
- VCC on the HC-SR04 to Arduino 5V
- GND on the HC-SR04 to Arduino GND
- Trig on the HC-SR04 to Arduino D9
- Echo on the HC-SR04 to Arduino D10
If you use a 3.3 V board, remember that the Echo output may require level shifting before connecting it directly to the microcontroller.
Basic Specifications of the HC-SR04
These are some typical HC-SR04 module specifications worth keeping in mind before using it in a project.
| Feature | Value |
|---|---|
| Supply voltage | 5 V |
| Typical current | 15 mA |
| Approximate measuring range | 2 cm to 400 cm |
| Ultrasonic frequency | 40 kHz |
| Approximate beam angle | 15 degrees |
| Typical accuracy | about 3 mm |
Although these values are very common in the sensor datasheets, the real result depends a lot on the measured surface, its orientation, and the environment.
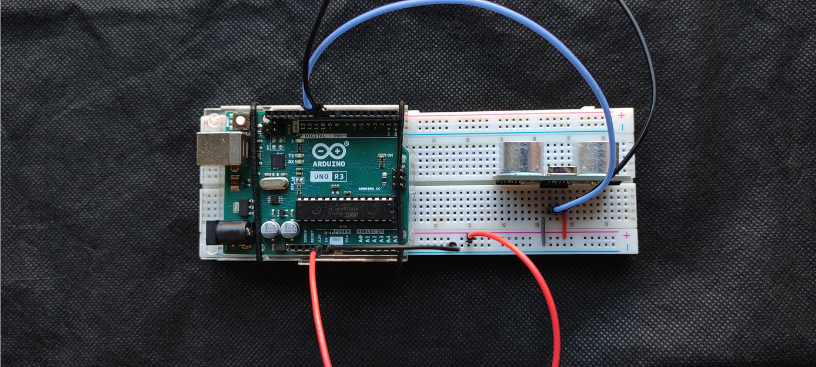
Connecting the HC-SR04 to Arduino
For a basic test, no additional components are required. You only need to power the sensor and connect its control pins to two Arduino digital pins.
The connection used in this tutorial is the following:
- VCC to 5V
- GND to GND
- Trig to D9
- Echo to D10
If you build the circuit on a breadboard, make sure the module is firmly placed and that the wires are short and secure to avoid false readings during measurement.
Code to Measure Distance with Arduino
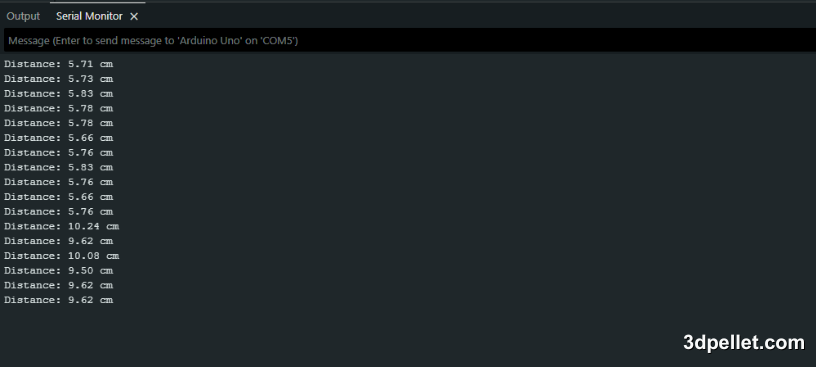
The following program triggers the sensor, measures the duration of the Echo pulse, calculates the distance in centimeters, and displays it in the serial monitor once per second. If no echo is received within the timeout period, the program prints a message indicating that the object is out of range or that no return was detected.
 1// Arduino example for the HC-SR04 sensor
 2// More information: https://www.3dpellet.com
 3
 4const int trigPin = 9;
 5const int echoPin = 10;
 6
 7void setup() {
 8  pinMode(trigPin, OUTPUT);
 9  pinMode(echoPin, INPUT);
10  Serial.begin(9600);
11}
12
13void loop() {
14  unsigned long echoTimeUs;
15  float distanceCm;
16
17  digitalWrite(trigPin, LOW);
18  delayMicroseconds(2);
19
20  digitalWrite(trigPin, HIGH);
21  delayMicroseconds(10);
22  digitalWrite(trigPin, LOW);
23
24  echoTimeUs = pulseIn(echoPin, HIGH, 30000);
25
26  if (echoTimeUs == 0) {
27    Serial.println("Out of range or no echo");
28  } else {
29    distanceCm = echoTimeUs * 0.0343 / 2.0;
30    Serial.print("Distance: ");
31    Serial.print(distanceCm);
32    Serial.println(" cm");
33  }
34
35  delay(1000);
36}
In this example, pulseIn() is used with a maximum wait time of 30000 us, which is enough for a simple demonstration without blocking the program too much. If you place a stable object in front of the sensor, you will see the distance change in the serial monitor as you move it closer or farther away.
Measurement Considerations
Although the HC-SR04 is very easy to use, there are several practical details that affect measurement quality.
The first important limitation is the blind zone. At very short distances, usually below about 2 cm, the sensor stops measuring correctly because the echo returns too quickly.
You should also consider the type of surface. Soft, irregular, or angled materials can absorb or deflect part of the sound, which can cause unstable readings or even no echo at all.
In environments with nearby walls or multiple objects, unwanted reflections may appear and alter the measurement. That is why it is a good idea to aim the sensor carefully and leave a small delay between measurements, such as the one-second wait used in this example.
Finally, the speed of sound changes slightly with ambient temperature. In most beginner projects this variation is not usually critical, but it is worth keeping in mind if you later need a more refined measurement.
Conclusion
The HC-SR04 is a very practical sensor for getting started with distance measurement using Arduino because its connection is simple, its cost is low, and it provides quick results without special libraries. With only four wires and a few lines of code, you can display real-time distances and use that information in robots, proximity alarms, level meters, or educational projects.