LM35 Temperature Sensor with Arduino
The LM35 is an analog temperature sensor widely used in educational and instrumentation projects because it provides a voltage directly proportional to degrees Celsius. Thanks to this, it can be connected to an analog input on an Arduino board and produce a measurement without the need for digital protocols or special libraries.
In this article we will see how this sensor works, how to identify its pins, what the basic Arduino connection looks like, and how to read the temperature in the serial monitor with a very simple program.
What is the LM35 sensor?
The LM35 is an integrated circuit designed to measure temperature and provide a linear analog output. Its main advantage is that it is calibrated directly in degrees Celsius, so there is no need to apply complicated conversions to interpret the reading.
In practice, this sensor delivers 10 mV for each degree Celsius. For example, if the temperature is 25 °C, its output will be approximately 0.25 V. If the temperature rises to 30 °C, the output will be close to 0.30 V. This linear relationship makes it a very convenient sensor for getting started with analog measurements in Arduino projects.
Pins and operation of the LM35
If you look at the LM35 from the front, with the flat face toward you and the legs pointing downward, the usual pin arrangement is as follows:
- Vs: positive power supply for the sensor.
- Vout: analog output proportional to temperature.
- GND: ground or common reference.

The operation is straightforward: the sensor measures the ambient temperature and generates on Vout a voltage proportional to that temperature with a scale of 10 mV/°C. This means the conversion is very simple:
- 100 mV correspond to 10 °C
- 250 mV correspond to 25 °C
- 500 mV correspond to 50 °C
Since it is a small package, it is important to pay close attention to its orientation before powering it. If it is connected backwards, the sensor can heat up and become damaged.
Basic specifications of the LM35
In Arduino kits with a TO-92 package, it is very common to find the LM35DZ variant. Using that reference, these are its basic specifications.
| Feature | Value |
|---|---|
| Output scale | 10 mV/°C |
| Output type | linear analog |
| Supply voltage | 4 V to 30 V |
| Temperature range | 0 °C to 100 °C |
| Typical accuracy at 25 °C | ±0.5 °C |
If your sensor belongs to another variant in the LM35 family, the operating range may change. It is advisable to check the marking on the package or the manufacturer datasheet if you need to work close to the temperature limits.
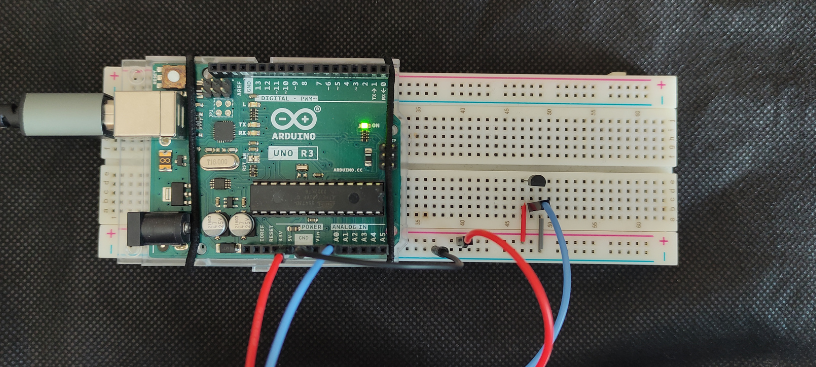
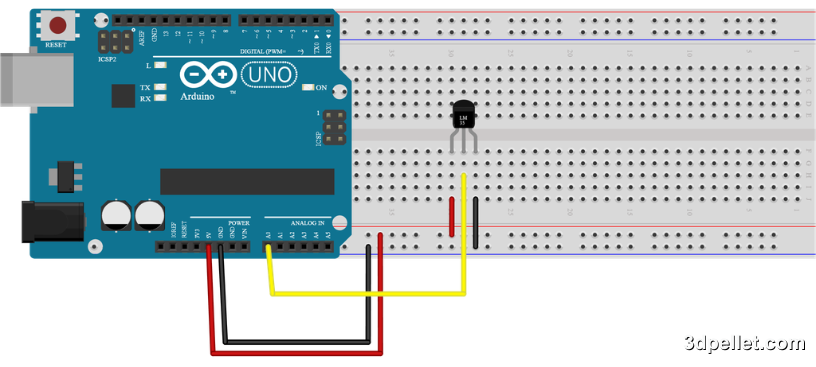
Connecting the LM35 to Arduino
For a basic test, no additional components are required. You just need to power the sensor and connect its analog output to an Arduino input. The simplest connection is the following:
- Vs on the LM35 to 5V on Arduino
- Vout on the LM35 to A0 on Arduino
- GND on the LM35 to GND on Arduino
If you mount the sensor on a breadboard, make sure each leg is in a different row to avoid accidental short circuits.
To obtain a more stable reading, try to keep the sensor away from the voltage regulator on the board or from other nearby heat sources.
Code to use the LM35 with Arduino
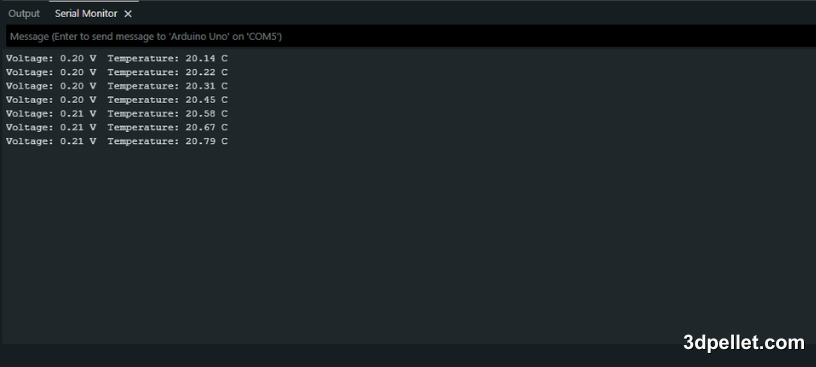
The following example reads input A0, calculates the voltage present at the sensor output, and converts it to degrees Celsius. It then prints both values to the Arduino IDE serial monitor every second.
 1// Arduino example to use the LM35 sensor
 2// More information: https://www.3dpellet.com
 3
 4void setup() {
 5  Serial.begin(9600);
 6}
 7
 8void loop() {
 9  float voltage = analogRead(A0) * (5.0 / 1023.0);
10  float tempC = voltage * 100.0;
11
12  Serial.print("Voltage: ");
13  Serial.print(voltage);
14  Serial.print(" V");
15  Serial.print("  Temperature: ");
16  Serial.print(tempC);
17  Serial.println(" C");
18
19  delay(1000);
20}
With this program, a reading of around 0.24 V or 0.25 V usually corresponds to a room temperature close to 24 °C or 25 °C.
Measurement considerations
Although the circuit is very simple, there are several details worth keeping in mind when measuring temperature with the LM35.
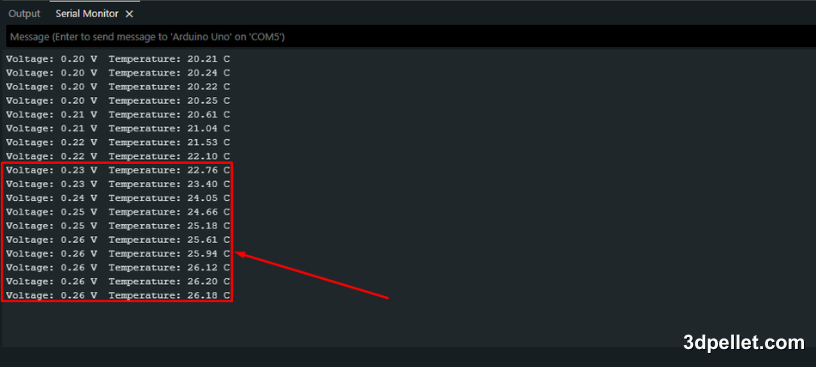
If you touch the sensor with your fingers for several seconds, the reading will rise because the package receives heat directly from your hand. This is useful to check that it responds, but not to obtain a reliable ambient measurement.
You should also consider the resolution of the Arduino analog-to-digital converter. On a 5 V board, each analogRead() step represents approximately 4.88 mV, which is equivalent to almost 0.49 °C with an LM35. To improve the reading in more demanding projects, one future option is to use a lower analog reference or apply an average of several samples before showing the result.
Conclusion
The LM35 is a very simple way to start measuring temperature with Arduino because its analog output is linear and its connection requires very few components. With just three wires and a few lines of code, you can display temperature in real time and use that information in thermometers, alarms, ventilation control, or small automation systems.